What is Docker and how does it work?This is the second chapter of the “Docker for Web Developers” book. It provides an overview of Docker concepts and technologies. The full course can be purchased from DockerWebDev.com.
Most tutorials attempt to explain Docker concepts first. That can be daunting so here’s the TL;DR alternative…
Docker runs an application such as MySQL in a single container.
It’s a lightweight virtual machine-like package containing an OS, the application files, and all dependencies.
Your web application will probably require several containers; your code (and language runtime), a database, a web server, etc.
A container is launched from an image.
In essence, it’s a container template which defines the OS, installation processes, settings, etc. in a Dockerfile configuration. Any number of containers can be started from the same image.
Containers start in clean (image) state and data is not permanently stored.
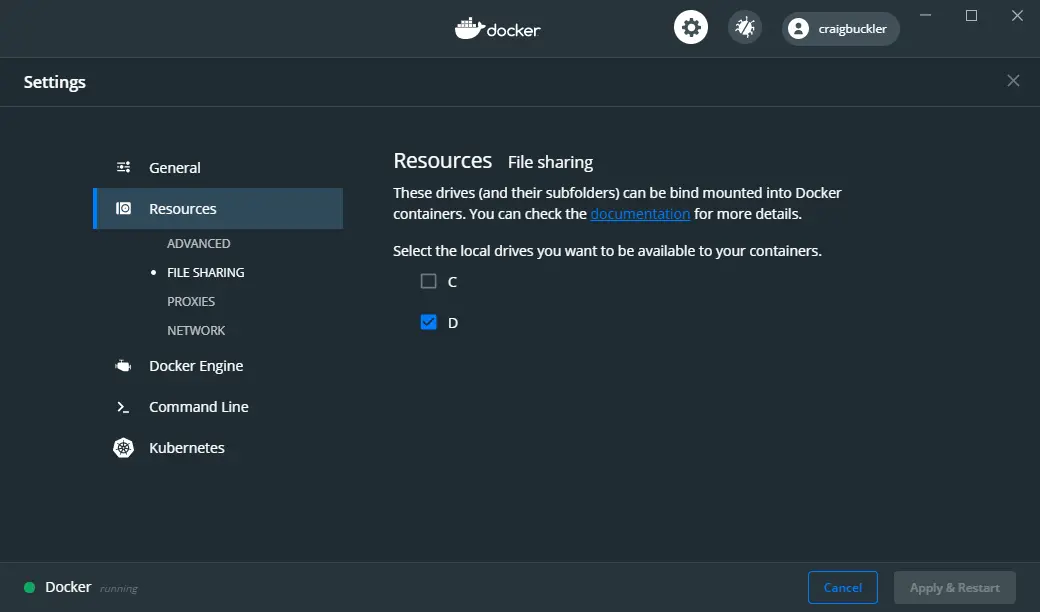
You can mount Docker volumes or bind host folders to retain state between restarts.
Containers are isolated from the host and other containers.
You can define a network and open TCP/IP ports to permit communication.
Each container is started with a single Docker command.
Docker Compose is a utility which can launch multiple containers in one step using a docker-compose.yml configuration file.
Optionally, orchestration tools such as Docker Swarm and Kubernetes can be used for container management and replication on production systems.
You’re welcome to skip the rest of this chapter and jump straight into the Docker examples. It’s worth coming back later: the concepts discussed below may change how you approach web development.
Containers #
Recall how you could use a Virtual Machine (VM) to install a web application and its dependencies. VM software such as VMware and VirtualBox are known as hypervisors. They allow you to create a new virtual machine, then install an appropriate operating system with the required application stack (web server, runtimes, databases, etc.):
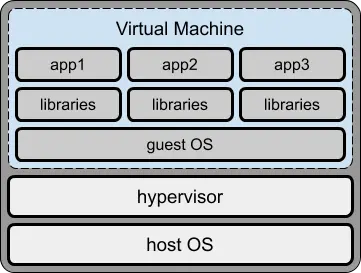
In some cases, it may not be possible to install all applications in a single VM so multiple VMs become necessary:
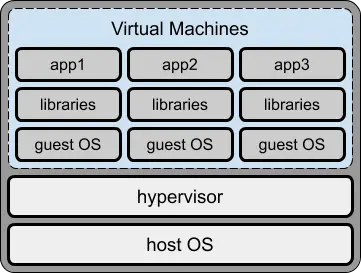
Each VM is a full OS running on emulated hardware in a host OS with access to resources such as networks via the hypervisor. This is a considerable overhead, especially when a dependency could be tiny.
Docker launches each dependency in a separate container. It helps to think of a container as a mini VM with its own operating system, libraries, and application files.
In reality:
- a virtual machine hypervisor emulates hardware so you can run a full Operating System
- Docker emulates an Operating System so you can run isolated applications within their own file system.
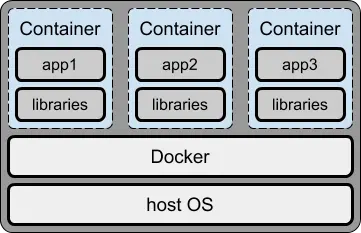
A container is effectively an isolated wrapper around an executable so Docker requires far fewer host OS resources than a VM.
It’s technically possible to run all your application’s dependencies in a single container, but there are no practical benefits for doing so and management becomes more difficult.
Always use separate containers for your application, the database, and any other dependencies you require.
Containers are isolated #
Each container is available at localhost or 127.0.0.1, but a TCP port must be exposed to communicate with the application it runs, e.g.
- port
80 or 443 for a HTTP or HTTPS web servers 3306 for MySQL27017 for MongoDB
Docker also allows you to access the container shell to enter terminal commands and expose further ports to attach debuggers and investigate problems.
Containers are stateless and disposable #
Data written to the container’s file system is lost the moment it is shuts down!
Any number of containers can be launched from the same base image (see below). This makes scaling easy because every container instance is identical and disposable.
This may change the way you approach application development if you want to use Docker on production servers. Presume your application has a variable which counts the number of logged-in users. If it’s running in two containers, either could handle a login so each would have a different user count.
Dockerized web applications should therefore avoid retaining state data in variables and local files. Your application can store data in a database such as redis, MySQL, or MongoDB so state persists between container instances.
It may be impractical to deploy an existing application using Docker containers if it was developed in a non-stateless way from the start. However, you can still run the application in Docker containers during development.
Which begs the question: what if your database is running in a container?
It will also lose data when it restarts, so Docker offers volumes and host folder bind mounts.
You may be thinking:
“ahh, I can get around the state issue by never stopping a container!”
That’s true. Presuming your application is 100% bug-free. And your runtime is 100% reliable. And the OS never crashes. And you never need update the host OS or the container itself.
Containers run on Linux #
It doesn’t matter what host OS you’re using: Docker containers run natively on Linux. Even Windows and macOS run Docker containers inside Linux…
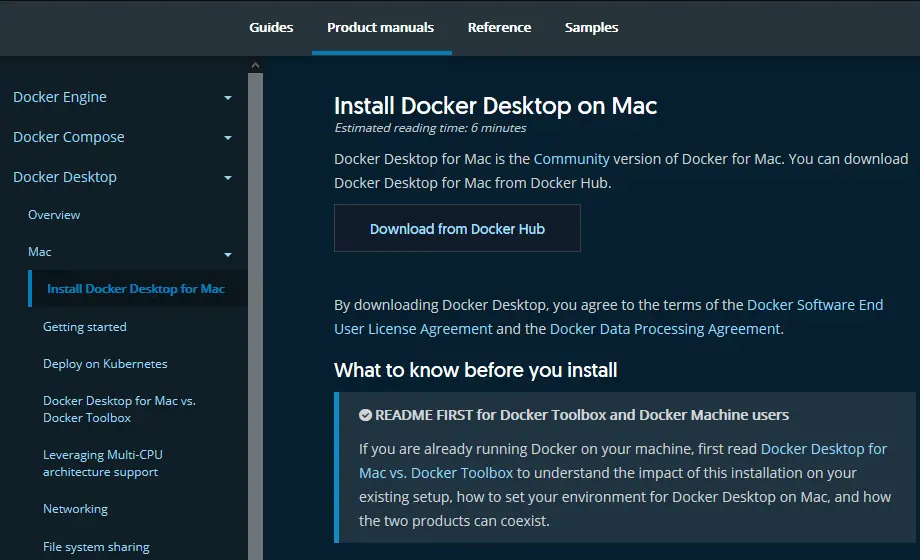
The macOS edition of Docker requires VirtualBox.
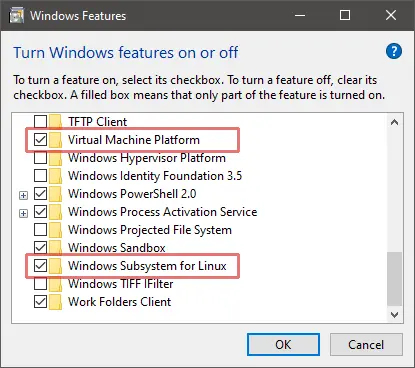
The Windows edition of Docker allows you to switch between either:
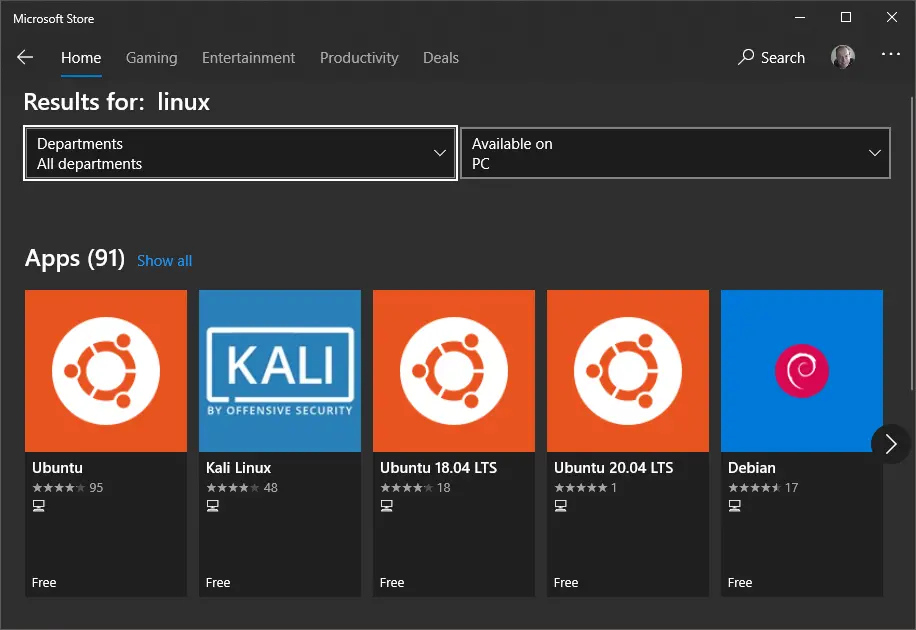
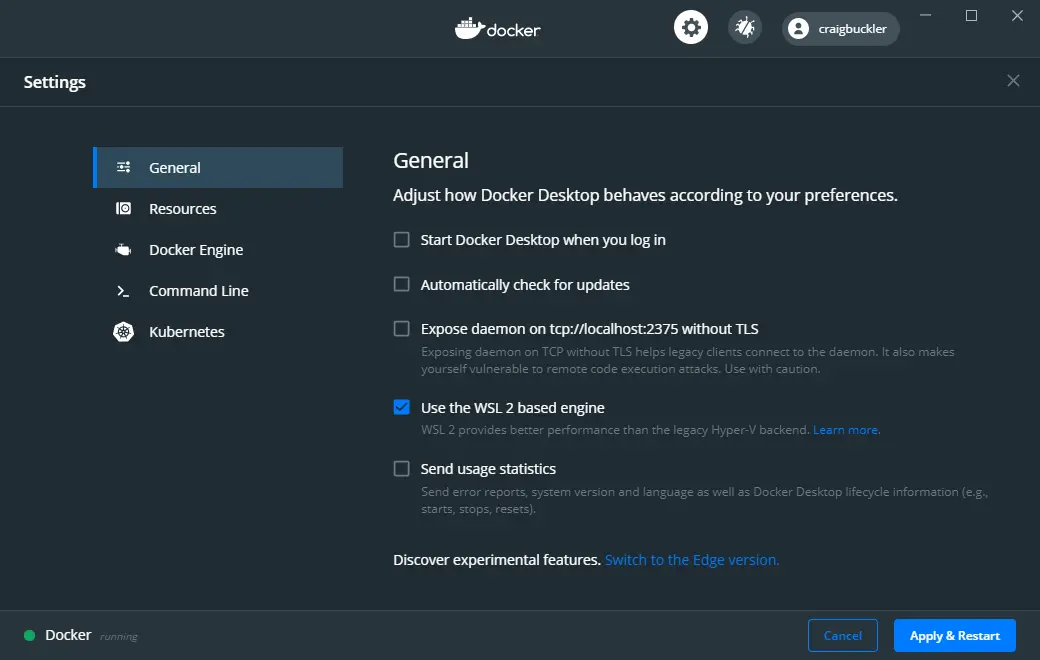
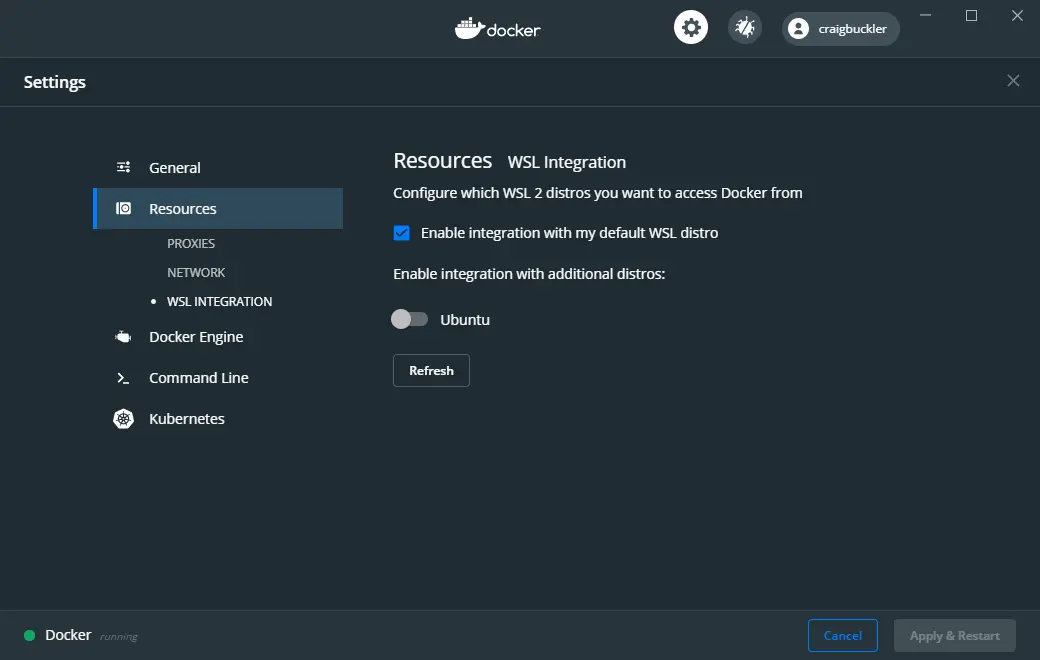
the Windows Subsystem for Linux (WSL) 2: a highly-integrated seamless VM which is available on all editions of Windows, or
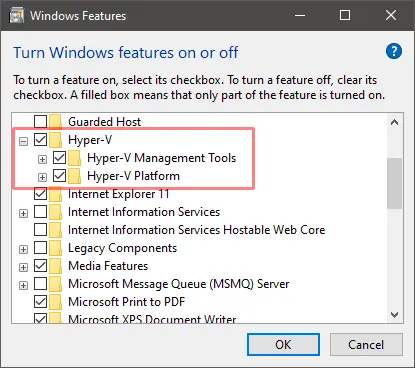
Hyper-V: the Microsoft hypervisor provided with Windows 10/11 Professional and Enterprise.
It is therefore more efficient to run Docker on Linux but this rarely matters on a development PC. Use whatever OS and tools you prefer.
However, if you are using Docker to deploy your application, Linux is the best choice for your live server.
Images #
A Docker image is a snapshot of a file and operating system with libraries and application executables. In essence, an image is a recipe or template for creating a container. (In a similar way that some computer languages let you define a reusable class template for instantiating objects of the same type.)
Any number of containers can be started from a single image. This permits scaling on production servers, although you’re unlikely to launch multiple containers from the same image during development.
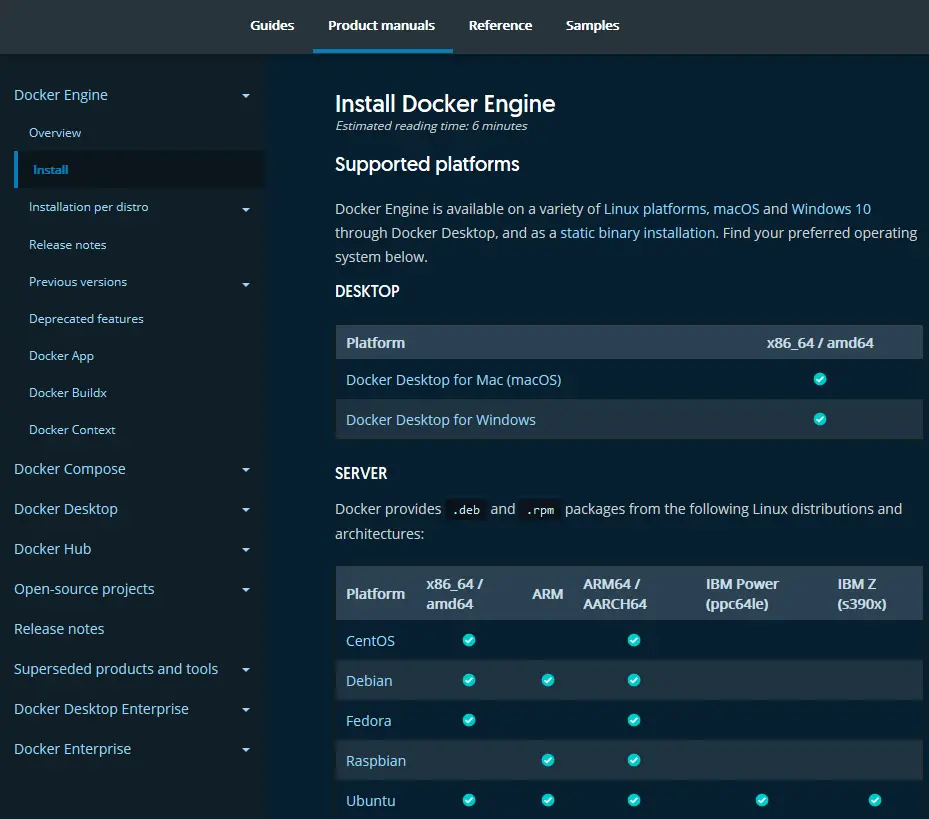
The Docker Hub provides a repository of commonly-used images for:
- dependencies such as NGINX, MySQL, MongoDB, Elasticsearch, redis etc.
- language runtimes or frameworks such as Node.js, PHP, Python, Ruby, Rust, and any other language you’ve heard of.
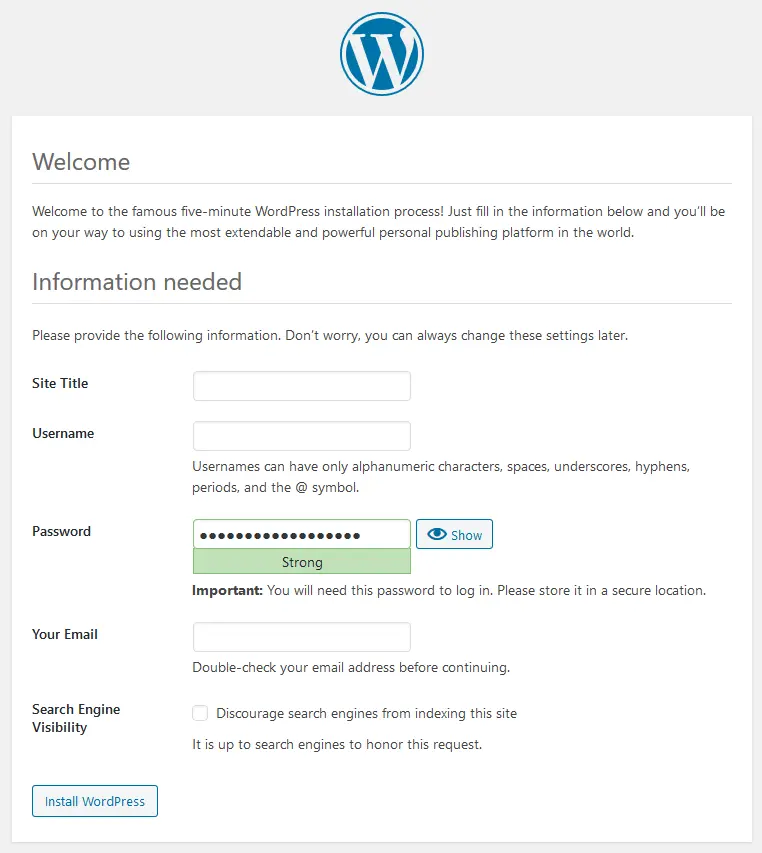
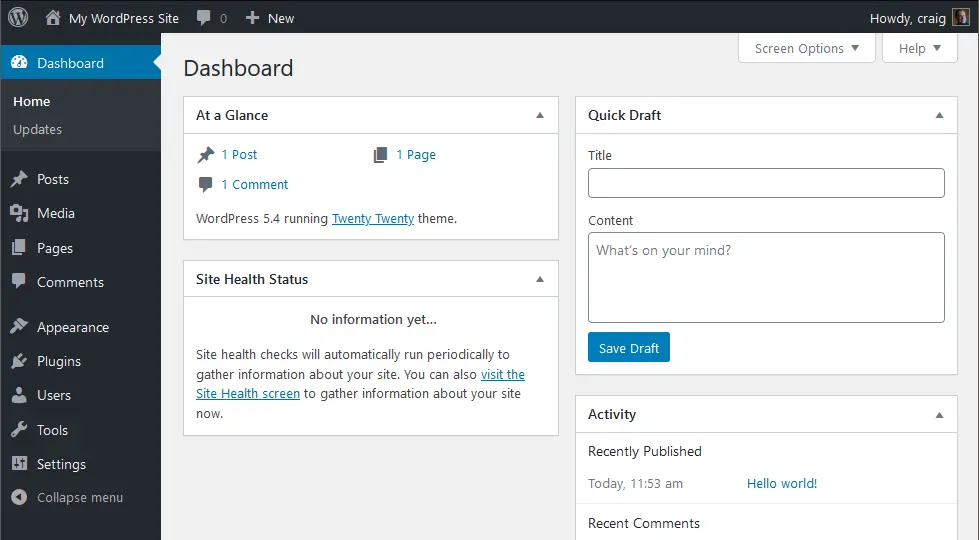
- applications such as WordPress, Drupal, Joomla, Nextcloud etc. (These often require additional containers such as databases.)
Reminder: sign-up for Docker Hub account if you’d like to publish your own images.
Dockerfile #
An image is configured using a Dockerfile. It typically defines:
- a starting base image – usually an operating system
- work directories and user permissions
- all necessary installation steps, such as defining environment variables, copying files from the host, running install processes, etc.
- whether the container should attach one or more volumes for data storage
- whether the container should join a network to communicate with others
- which ports (if any) are exposed to
localhost on the host - the application launch command.
In some cases, you will use an image as-is from Docker Hub, e.g. MySQL. However, your application will require it’s own custom Dockerfile.
Development and production Dockerfiles #
It is possible to create two Dockerfile configurations for your application:
one for development.
It would typically activate logging, debugging, and remote access. For example, during Node.js development, you might want to launch your application using Nodemon to automatically restart it when files are changed.
one for production.
This would run in a more efficient and secure mode. For Node.js deployment, it’s likely to use the standard node runtime command.
However, a simpler process is described throughout this book.
Image tags #
Docker Hub is to Docker images what Github is to Git repositories.
Any image you create can be pushed to Docker Hub. Few developers do this, but it may be practical for deployment purposes or when you want to share your application with others.
Images are name-spaced with your Docker Hub ID to ensure no one can use the same name. They also have a tag so you can create multiple versions of the same image, e.g. 1.0, 1.1, 2.0, latest etc.
<Your-Docker-ID>/<Your-Docker-Hub-Repository>:<tag>
Examples: yourname/yourapp:latest, craigbuckler/myapp:1.0.
Official images on Docker Hub don’t require a Docker ID, e.g. mysql (which presumes mysql:latest), mysql:5, mysql:8.0.20, etc.
Volumes #
Containers do not retain state between restarts. This is generally a good thing; any number of containers can be started from the same base image and each can handle incoming requests regardless of how or when they were launched (see Orchestration).
However, some containers – such as databases – absolutely must retain data so Docker provides two storage mechanism types:
- Volumes: a Docker-managed file system, and
- Bind mounts: a file or directory on the host machine.
Either can map to a directory on the container, such as /data/db for MongoDB storage.
Volumes are the recommended way to persist data. In some cases, it’s the only option – for example, MongoDB does not currently support bind mounts on Windows or macOS file systems.
However, bind mounts are practical during development. An application folder on the host OS can be mounted within the container so any file changes trigger an application restart, browser refresh, etc.
It is possible to mount the same volume or bind mount on two or more containers. Read-only access should be fine, but you could encounter issues if more than one container attempted to write to the same file at the same time!
Networks #
Any TCP/IP port can be exposed on a container, such as 3306 for MySQL. This allows the applications on the host to communicate with the database system at localhost:3306.
An application running in another container could not communicate with MySQL because localhost resolves to itself. For this reason, Docker creates a virtual network and assigns each running container a unique IP address. It’s then becomes possible for one container to communicate with another using its address.
Unfortunately, Docker IP addresses can change every time a container is launched. An easier option is to create your own Docker virtual network. Any container added to that network can communicate with another using its name, i.e. mysql:3306 resolves to the correct address.
Container TCP/IP ports can be exposed:
- within the virtual network only, or
- within the virtual network and to the host.
Presume you are running two containers on the same Docker network:
- a container named
phpapp which exposes a web application on port 80 - a container named
mysql which exposes a database on port 3306.
During development, you would want both ports exposed to the host. The application can be launched in a web browser at http://localhost/ (port 80 is the default) and MySQL clients can connect to http://localhost:3306/.
In production environments, the mysql port need not be exposed to the host. The phpapp container can still communicate with mysql:3306, but unscrupulous crackers would not be able to probe port 3306 on the host.
With careful planning, it’s possible to create complex Docker networks which heighten security, e.g. mysql and redis containers can be accessed by phpapp but they cannot access each other.
Docker Compose #
A single container is launched with a single docker command. An application requiring several containers – say Node.js, NGINX, and MongoDB – must be started with three commands. You could launch each in three terminals in the correct order (probably MongoDB, then the Node.js application, then NGINX).
Docker Compose is a tool for managing multiple containers with associated volumes and networks. A single configuration file, normally named docker-compose.yml, defines the containers and can override Dockerfile settings where necessary.
It’s practical to create a Docker Compose configuration for development. You could also create one for production, but there are better options…
Orchestration #
Containers are portable and reproducible. A single application can be scaled by launching identical containers on the same server, another server, or even a different data center on the other side of the world.
The process of managing, scaling, and maintaining containers is known as orchestration. Docker Compose can be used for rudimentary orchestration, but it’s better to use specialist tools such as:
Cloud hosts offer their own orchestration solutions, such as AWS Fargate, Microsoft Azure, and Google Cloud. These are often based on Kubernetes but may have custom options or tools.
Docker client-server application #
Docker is a client-server application. The server is responsible for container management and is controlled via a REST API. The command-line interface (CLI) communicates with this API, so it’s possible to run a server daemon anywhere and connect from another device.
This rarely matters during development: the Docker server and CLI is installed on the same PC.
You can communicate with the API using any HTTP client such as cURL. This is beyond the scope of this book, but it allows you to programmatically run any Docker process.
Docker deployment strategies #
You can use Docker and containers in any way that is practical for your project.
This book suggests you always use Docker during development. It allows you to create robust and portable environments where your application and each dependency run in separate containers. Chapters 4, 5, 6, and Appendix D provide recipes you can adapt to your projects.
However, deploying your application to a live server raises further options to consider…
Use Docker for development only #
Docker is used to emulate your live server’s production environment on your development PC. The live server itself does not use containers.
This may be practical when you’re using infrastructures, platforms, or software as a service (IaaS, PaaS, SaaS) where a pre-built environment is provisioned for you. Possible examples include serverless and WordPress hosts.
Use Docker on production servers where practical #
Your live production server uses Docker containers for some – but not all – dependencies. Your application is likely to be a good candidate, but a database could be provided by a cloud service, and a load balancer could be supplied by the hosting company.
Your development PC can still emulate this environment using Docker containers. That said, a test database could be provided by the same cloud service to eliminate compatibility issues.
Use Docker for both development and production #
You use mostly identical Docker containers in both development and production. It may be necessary to create slightly different live server configurations or consider orchestration options.
Concurrent processing considerations #
Runtimes such as Node.js and Python run scripts on a single processing thread. A server with 16 CPU cores executing a single instance of an application will have fifteen cores sitting idle!
Note: some stacks alleviate this situation with a web server. PHP is single-threaded, but Apache launches a thread for each user request so multiple PHP processes run in parallel. This method has its own resourcing problems, though.
Multiple instances of Node.js applications can be launched on the same server using clustering or process managers such as PM2. However, it is generally more practical to use Docker to launch and manage multiple application containers as resources permit. Each container is isolated so, if an individual instance crashes, it will not affect others and can be restarted.
Simpler development and production #
This book uses the following approach where practical:
- An application Dockerfile configures the production environment only.
- Docker Compose is used to override this base configuration for development purposes.
An image can therefore be used as-is on production servers regardless of whichever orchestration or deployment process is adopted.
Don’t worry about this for now – the process will become clearer in the following chapters.
When not to use Docker #
Using Docker during development has no downsides. It enables you to install dependencies on any OS and emulate a live system. You can easily share that isolated environment with others while retaining your favorite editor and tools.
However, Docker is not a magical solution which solves all your production woes! There are situations when Docker may not be appropriate…
Your application is not stateless
Dockerizing an existing monolithic application can be difficult if it was not originally designed for a container-based deployment. Programs which store state in variables or files will need to be adapted to use other data stores.
You’re using a Windows Server
Docker is native on Linux but Windows runs containers in a Hyper-V virtual machine or WSL2 (effectively another VM). It’s an additional overhead and, although Docker lets you run Linux dependencies, it may be more practical to provision a Linux server.
Performance is critical
Docker containers have imposed CPU and RAM limits. These are configurable, but an application running on the host OS will always be faster.
That said, Docker can implement parallel processing by scaling horizontally if your application generally runs on a single CPU core.
Stability is important
Docker is mature, but it’s another dependency to install, update, and manage. Do you have in-house container management expertise?
Your application may seem more robust since containers can be scaled and automatically restarted. That doesn’t mean it’s crashing less often than before!
To store mission-critical data
Volumes and bind mounts can store persistent data, but these are more difficult to manage and back-up than standard file system options.
To improve security
Containers are isolated but, unlike a real VM, they are not fully sandboxed from the host OS. Docker provides options for hiding dependencies, but it’s not a substitute for robust security.
To create GUI applications
Someone, somewhere will have created a cross-platform graphical interface application using containers. That doesn’t make Docker the ideal solution!
Because Docker is cool
Jumping on a technology bandwagon without proper investigation and justification is doomed to fail.
Docker alternatives #
Docker is the most-used container solution but it’s not the only option. Alternatives include:
Key points #
What you’ve learned in this chapter:
The Docker server manages containers.
It’s an isolated wrapper around an application, which seems similar to a virtual machine but is more lightweight.
Containers are launched from a single image template configured by a Dockerfile.
Images for hundreds of applications are available on Docker Hub.
Containers are stateless, but can attach to Docker disk volumes or bind-mounted folders on the host OS.
Containers can expose application ports and communicate over internal Docker networks.
Ports can also be exposed to the host OS.
Docker Compose can be used to launch multiple containers at once.
Orchestration tools such as Docker Swarm and Kubernetes can be used to launch and scale containers across multiple systems in production environments.
Docker is practical during development.
However, it’s not necessarily essential or practical to use it for every application component on production systems.
Enough theory. It’s time to install Docker…
]]>